【React入門】初心者必見!React + TypeScriptで環境構築

Reactとは
ReactとはJavaScriptを使ったフロントのフレームワークです。
仮想DOMへのレンダリングでの開発が行われるので、処理の高速です。
また、関数をコンポーネントを使って無駄のないプログラムを書いていく言語で人気のフレームワークの一つです。
Reactアプリの環境構築手順
スポンサードサーチ
ReactとTypeScriptでProjectを作成
「npx create-react-app アプリ名 –template typescript」でreactにtypescriptを使用してアプリを作成できます。
npx create-react-app アプリ名 --template typescript
以下、ターミナルのコマンドログです。
kami@kami dev % npx create-react-app react_ts_test --template typescript

Creating a new React app in /Users/kami/Desktop/work/dev/react_ts_test.

Installing packages. This might take a couple of minutes.
Installing react, react-dom, and react-scripts with cra-template-typescript...


added 1425 packages in 1m

229 packages are looking for funding
  run `npm fund` for details

Initialized a git repository.

Installing template dependencies using npm...

added 52 packages, and changed 2 packages in 11s

238 packages are looking for funding
  run `npm fund` for details

We detected TypeScript in your project (src/App.test.tsx) and created a tsconfig.json file for you.

Your tsconfig.json has been populated with default values.

Removing template package using npm...


removed 1 package, and audited 1477 packages in 1s

238 packages are looking for funding
  run `npm fund` for details

6 high severity vulnerabilities

To address all issues (including breaking changes), run:
  npm audit fix --force

Run `npm audit` for details.

Created git commit.

Success! Created react_ts_test at /Users/kami/Desktop/work/dev/react_ts_test
Inside that directory, you can run several commands:

  npm start
    Starts the development server.

  npm run build
    Bundles the app into static files for production.

  npm test
    Starts the test runner.

  npm run eject
    Removes this tool and copies build dependencies, configuration files
    and scripts into the app directory. If you do this, you can’t go back!

We suggest that you begin by typing:

  cd react_ts_test
  npm start

Happy hacking!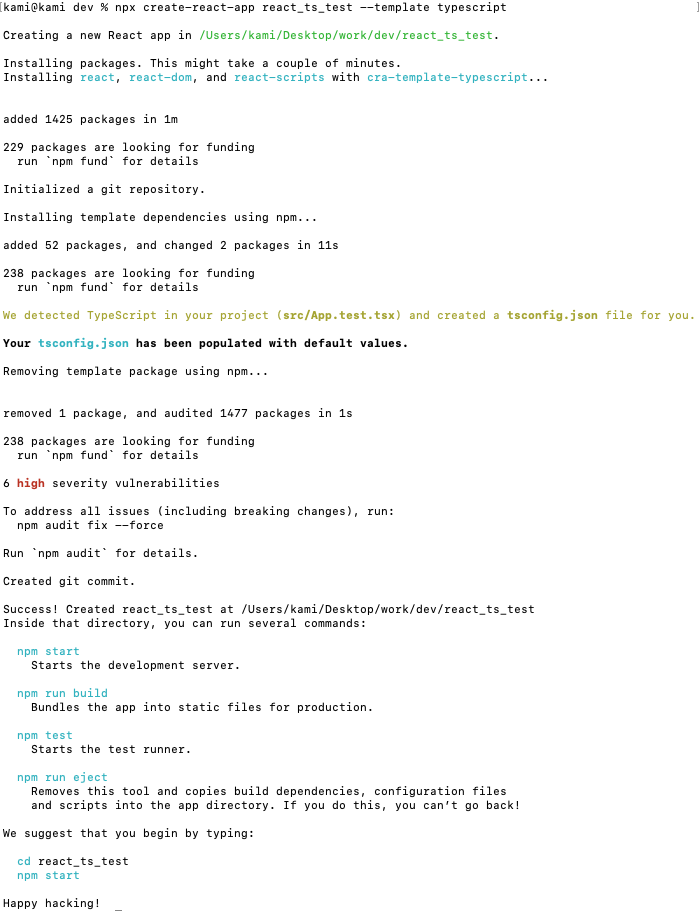
「Happy hacking!」が表示されればアプリが作成されました。
プロジェクト構造
アプリ名/
├── node_modules/
├── public/
│   ├── favicon.ico
│   ├── index.html
│   ├── logo192.png
│   ├── logo512.png
│   ├── manifest.json
│   └── robots.txt
├── src/
│   ├── App.css
│   ├── App.test.tsx
│   ├── App.tsx
│   ├── index.css
│   ├── index.tsx
│   ├── logo.svg
│   ├── react-app-env.d.ts
│   └── reportWebVitals.ts
│   └── setupTests.ts
├── .gitignore
├── package.json
├── README.md
├── tsconfig.json
└── yarn.lock / package-lock.json
node_modules
- プロジェクトの依存パッケージがインストールされるディレクトリ。
npm installを実行すると、このディレクトリに必要なパッケージがダウンロードされます。
public
- 静的ファイルを配置するディレクトリ。アプリケーションの公開ファイル(HTML、画像、faviconなど)が含まれます。
index.html: アプリケーションのエントリーポイントとなるHTMLファイル。favicon.ico: ブラウザのタブに表示されるアイコン。- その他のファイル(
logo192.png,logo512.png,manifest.json,robots.txt)は、PWA(プログレッシブウェブアプリ)の設定やSEOに関連します。
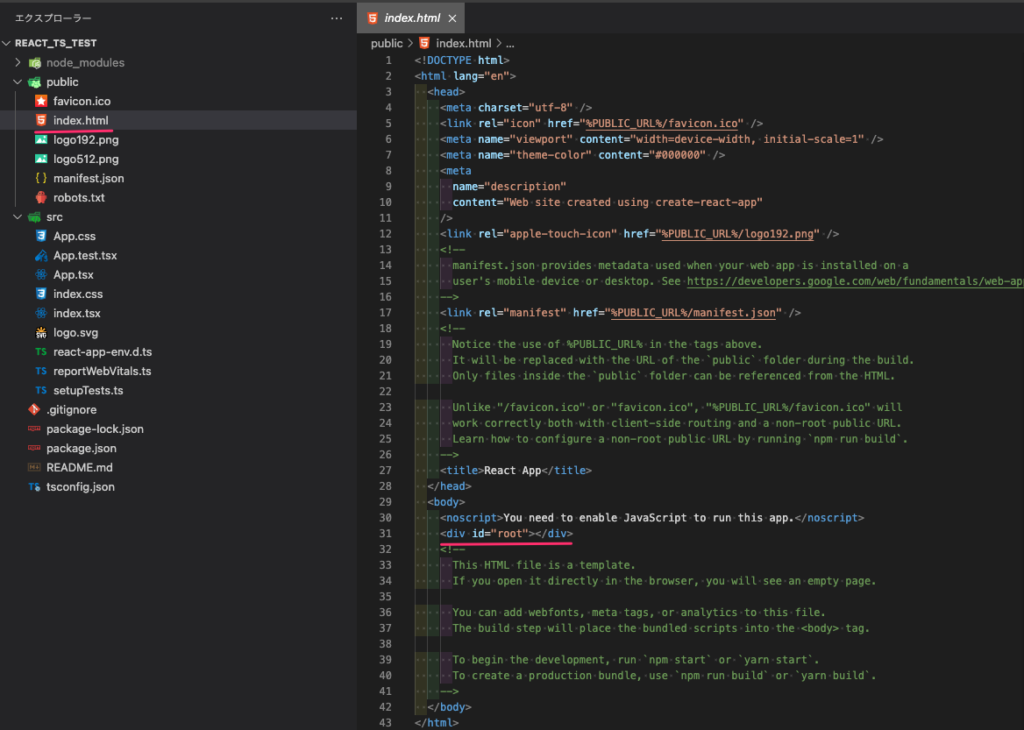
public/index.html
index.htmlでポイントは「body」タグ内にある「id="root"」です。
このidにReactファイルを読み込ませるようにプログラムを書いていきます。
ここはJavaScriptもTypeScriptも一緒ですね
src
- アプリケーションのソースコードが含まれるディレクトリ。主要なReactコンポーネントやスタイルシートがここにあります。
App.css:App.tsxコンポーネントのスタイルシート。App.test.tsx:App.tsxのテストコード。App.tsx: メインのReactコンポーネント。index.css: グローバルなスタイルシート。index.tsx: Reactアプリケーションのエントリーポイント。ReactDOMを使用してAppコンポーネントをHTMLにレンダリングします。logo.svg: ロゴ画像ファイル。react-app-env.d.ts: TypeScriptの環境設定ファイル。reportWebVitals.ts: アプリケーションのパフォーマンス計測のためのファイル。setupTests.ts: テストのセットアップファイル。
src/App.tsx
「src/App.tsx」ではApp関数内にHTMLの記述をしています。
tsxの拡張子はTypeScriptとHMLの記述をすることができます。
classの書き方
<div className="App">imgの書き方
<img src={logo} className="App-logo" alt="logo" />aタグの書き方
 <a
   className="App-link"
   href="https://reactjs.org"
   target="_blank"
   rel="noopener noreferrer"
>
import React from 'react';
import logo from './logo.svg';
import './App.css';
function App() {
return (
<div className="App">
<header className="App-header">
<img src={logo} className="App-logo" alt="logo" />
<p>
Edit <code>src/App.tsx</code> and save to reload.
</p>
<a
className="App-link"
href="https://reactjs.org"
target="_blank"
rel="noopener noreferrer"
>
Learn React
</a>
</header>
</div>
);
}
export default App;src/index.tsx

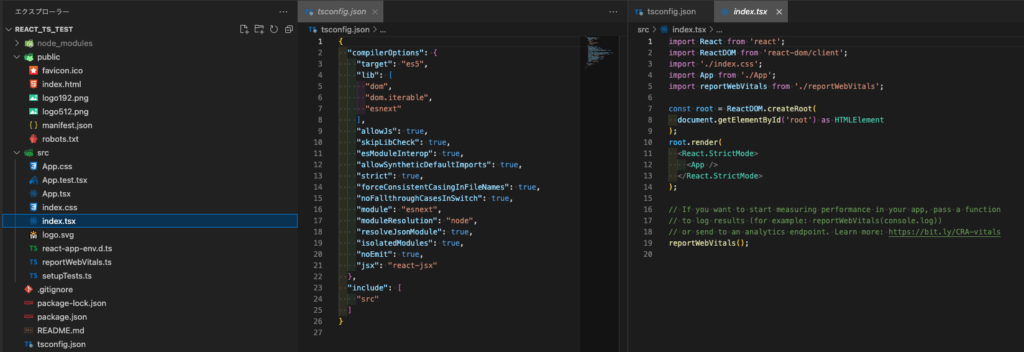
「src/index.tsx」ファイルが一番最初に呼ばれるファイルです
React と ReactDOM をインポートして、Reactの機能を使用できるようにします。
App コンポーネントをインポートして、メインコンポーネントとして使用します。
ReactDOM.render メソッドを使って、App コンポーネントをHTMLのid="root"要素にマウントします。
「src/index.tsx」では、React要素をルートをDOMノードにレンダーするには、まず ReactDOM.createRoot() に DOM 要素を渡し、root.render() に React 要素を渡します。
// Reactのライブラリをインポート
import React from 'react';
// ReactDOMのライブラリをインポート
import ReactDOM from 'react-dom/client';
// グローバルスタイルシートをインポート
import './index.css';
// アプリケーションのメインコンポーネントをインポート
import App from './App';
// アプリケーションのパフォーマンス測定用の関数をインポート
import reportWebVitals from './reportWebVitals';

// ReactDOM.createRootを使用して、Reactアプリケーションのルートを作成
const root = ReactDOM.createRoot(
  // 'root'というIDを持つHTML要素を取得し、それをReactのルート要素として使用
  document.getElementById('root') as HTMLElement
);

// root.renderメソッドを使用して、Reactコンポーネントをルート要素にレンダリング
root.render(
  // <React.StrictMode>でラップすることで、開発モードで追加のチェックと警告を有効にする
  <React.StrictMode>
    {/* アプリケーションのメインコンポーネントである<App />をレンダリング */}
    <App />
  </React.StrictMode>
);

// アプリケーションのパフォーマンスを測定するための関数を呼び出し
// 結果をコンソールにログとして出力する
reportWebVitals(console.log);
Reactアプリケーションのルートを作成
- ReactDOM.createRoot を使用して、Reactアプリケーションのルートを作成します
- document.getElementById('root’) でHTMLのルート要素を取得し、これをReactのルート要素として使用します。
const root = ReactDOM.createRoot(
  document.getElementById('root') as HTMLElement
);
コンポーネントのレンダリング
- root.render メソッドを使用して、App コンポーネントをルート要素にレンダリングします。
ラップすることで、開発モードで追加のチェックと警告を有効にします。
root.render(
  <React.StrictMode>
    <App />
  </React.StrictMode>
);
.gitignore
- Gitで管理しないファイルやディレクトリを指定するファイル。デフォルトでは
node_modules/やビルド出力ファイルなどが含まれます。
package.json
- プロジェクトの依存関係やスクリプト、メタ情報を記述したファイル。
README.md
- プロジェクトの概要や使い方、インストール手順などを記載するMarkdownファイル。
tsconfig.json
- TypeScriptコンパイラの設定を記述したファイル。プロジェクト内のTypeScriptの動作をカスタマイズできます。
{
  "compilerOptions": {
    "target": "es5",
    "lib": [
      "dom",
      "dom.iterable",
      "esnext"
    ],
    "allowJs": true,
    "skipLibCheck": true,
    "esModuleInterop": true,
    "allowSyntheticDefaultImports": true,
    "strict": true,
    "forceConsistentCasingInFileNames": true,
    "noFallthroughCasesInSwitch": true,
    "module": "esnext",
    "moduleResolution": "node",
    "resolveJsonModule": true,
    "isolatedModules": true,
    "noEmit": true,
    "jsx": "react-jsx"
  },
  "include": [
    "src"
  ]
}
yarn.lock・package-lock.json
- プロジェクトの依存関係のバージョンを固定するためのロックファイル。
npmを使用する場合はpackage-lock.json、yarnを使用する場合はyarn.lockが生成されます

以下のファイルは不要なので削除しても構いません
- setupTests.ts
- reportWebVitals.ts
- logo.svg
スポンサードサーチ
Reactでローカルサーバーを起動
カレントディレクトリをApp名に変更して「npm start」コマンドを叩きます
cd App名
npm start
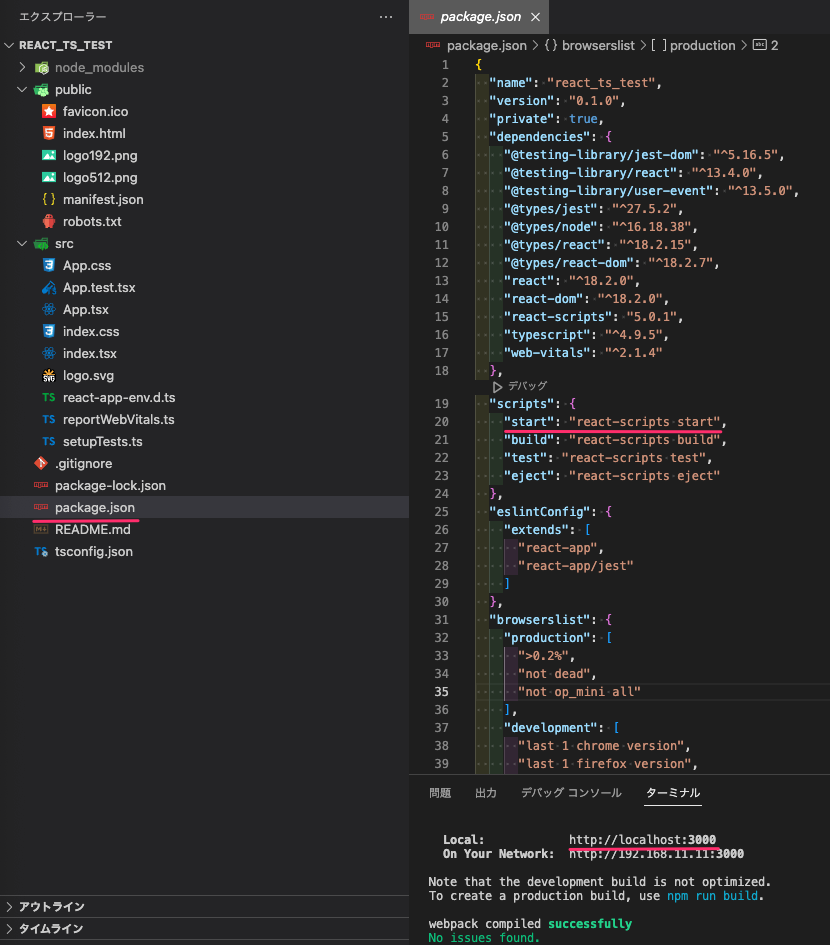
※npmのscriptsコマンドはpackage.jsonのscriptsに記述されています。
上記、ポート番号でReact開発のローカルサーバーが起動を確認できます。
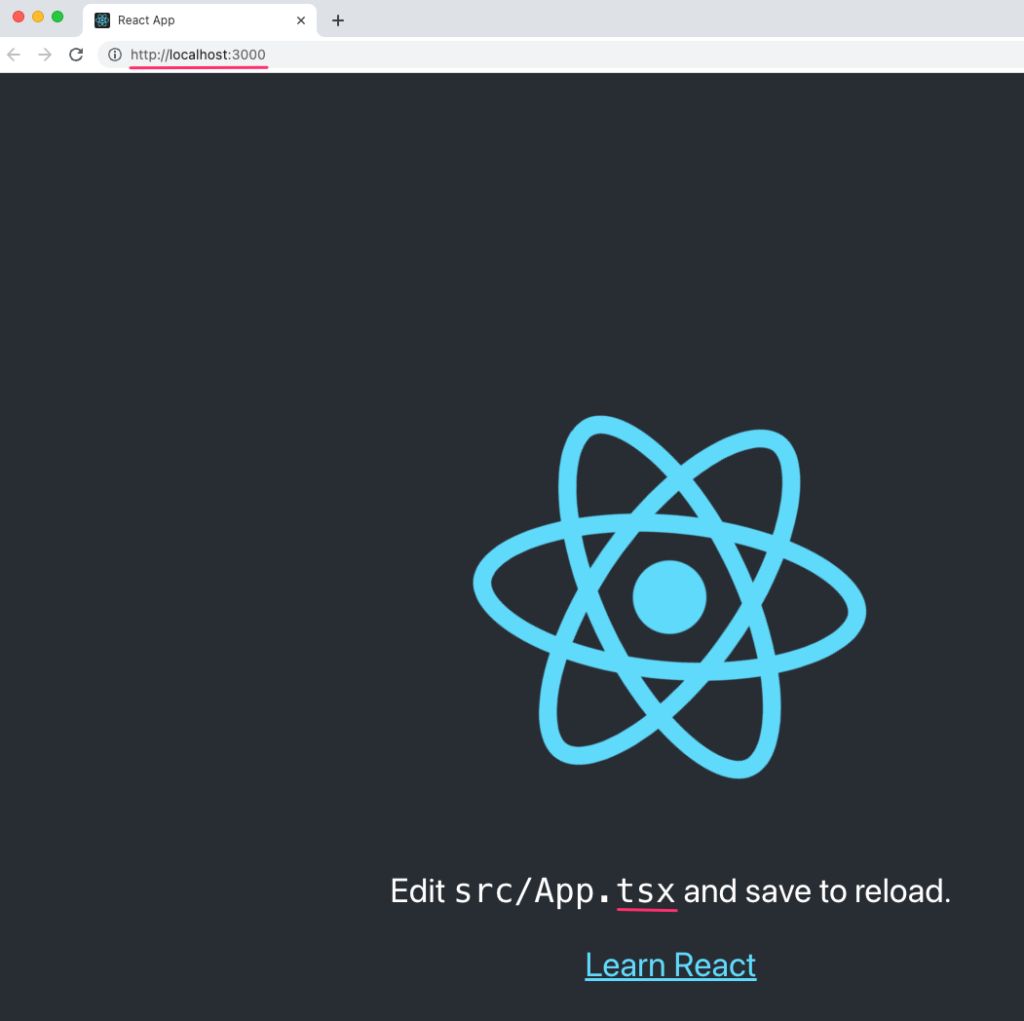
以上で環境構築終了です。